一、Zigbee概述
1.什么是Zigbee
ZigBee是一种近距离、低复杂度的双向无线通信系统,主要用于距离短、功耗低、传输速率不高的电子设备之间进行数据传输,且具有低功耗、低成本、大容量、时延短、可靠性高以及网络拓扑结构灵活的特点。
Zigbee本质就是无线设备之间的一种通信方式,类似于人和人之间用普通话交流,普通话就是一种通信方式。Zigbee,Zigbee通信方式,Zigbee协议说的都是一回事。
Zigbee的主要作用是用来构建无线局域网。
2.各通信方式的比较
蓝牙:功耗比较低,组建网络节点数少(7~8个)
WIFI:通信速率比较大,功耗大,等等
Zigbee: 优点:可以组建大规模的网络,功耗低(TI cc2530正常工作电流8mA,最低工作电流只有几uA) 缺点:通信速率比较小( 250KBPS)
注意:Zigbee只是完成数据通信的工作,要实现具体的使用的功能系统,一般会把Zigbee模块连接到计算机(处理器),计算机通过编好的程序来对整个系统进行监控。
3.相关概念
Zigbee联盟:制定Zigbee协议的协会组织(美国)
TI(德州仪器):一个Zigbee芯片厂商,主要把Zigbee协议用于推广和实际应用。除了TI,还有ember,飞思卡尔等等
Zstack:TI公司推出Zigbee软件上支持的协议栈。实质就是一堆示例代码。
cc2530:TI公司推出的支持Zigbee底层协议的一种芯片(8051单片机内核)
cc2530F256 TI 58J
IAR:写Zigbee程序的一个软件,集成开发工具,编辑器,编译器,下载器,仿真器。
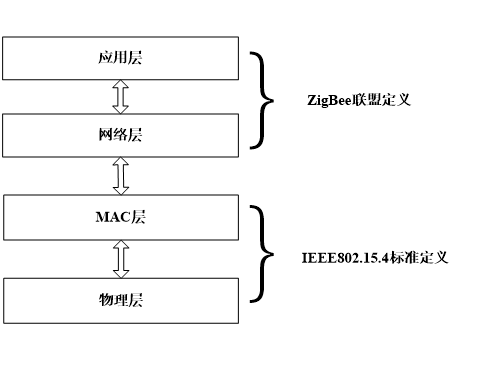
4.Zigbee网络体系结构
ZigBee协议基础为IEEE 802.15.4,ZigBee联盟在IEEE 802.15.4基础之上重新定义了网络层和应用层。Zigbee使用全球免费频段进行通讯,能够在三个不同的频段上通讯。全球通用的频段是 2.400GHz-2.484GHz,欧洲采用的频段是 868.0 MHz-868.66MHz,美国采用的频段是 902MHz-928MHz。传输速率分别为 250kbps 20kbps 和 40kbps。
二.IAR软件的安装使用
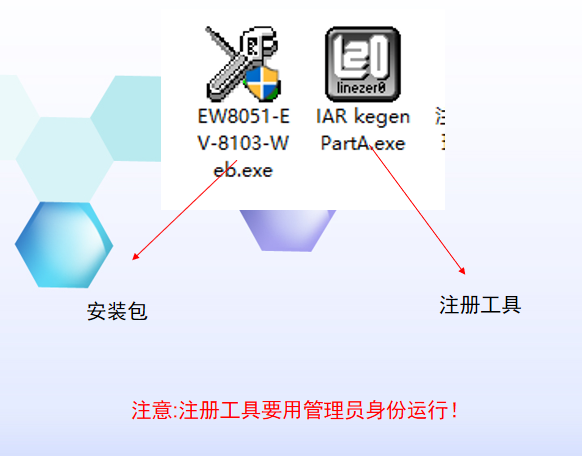
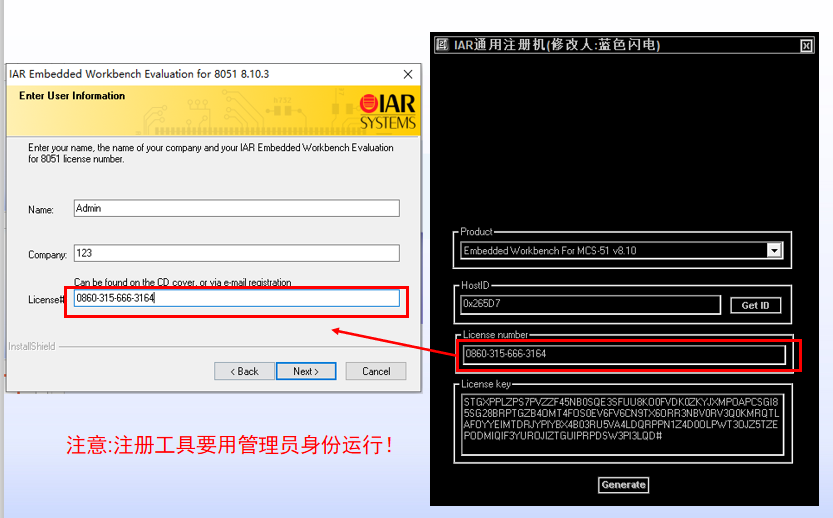
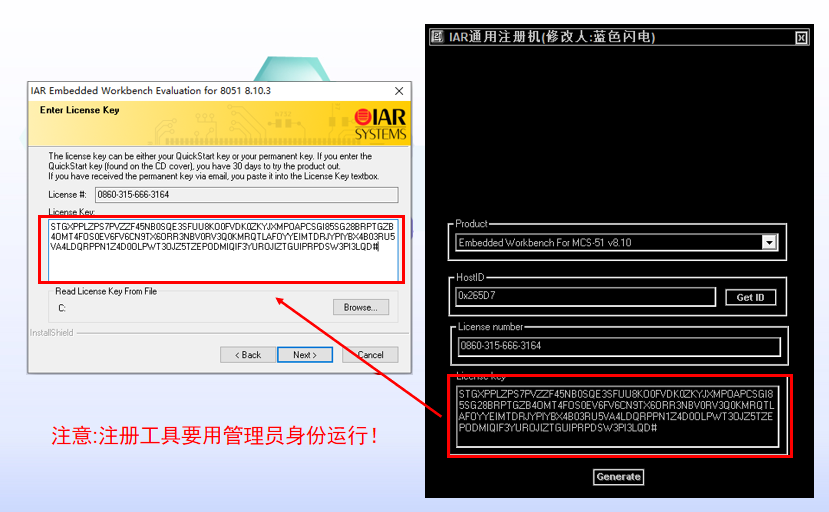
1.IAR软件的安装与注册
2.IAR工程建立
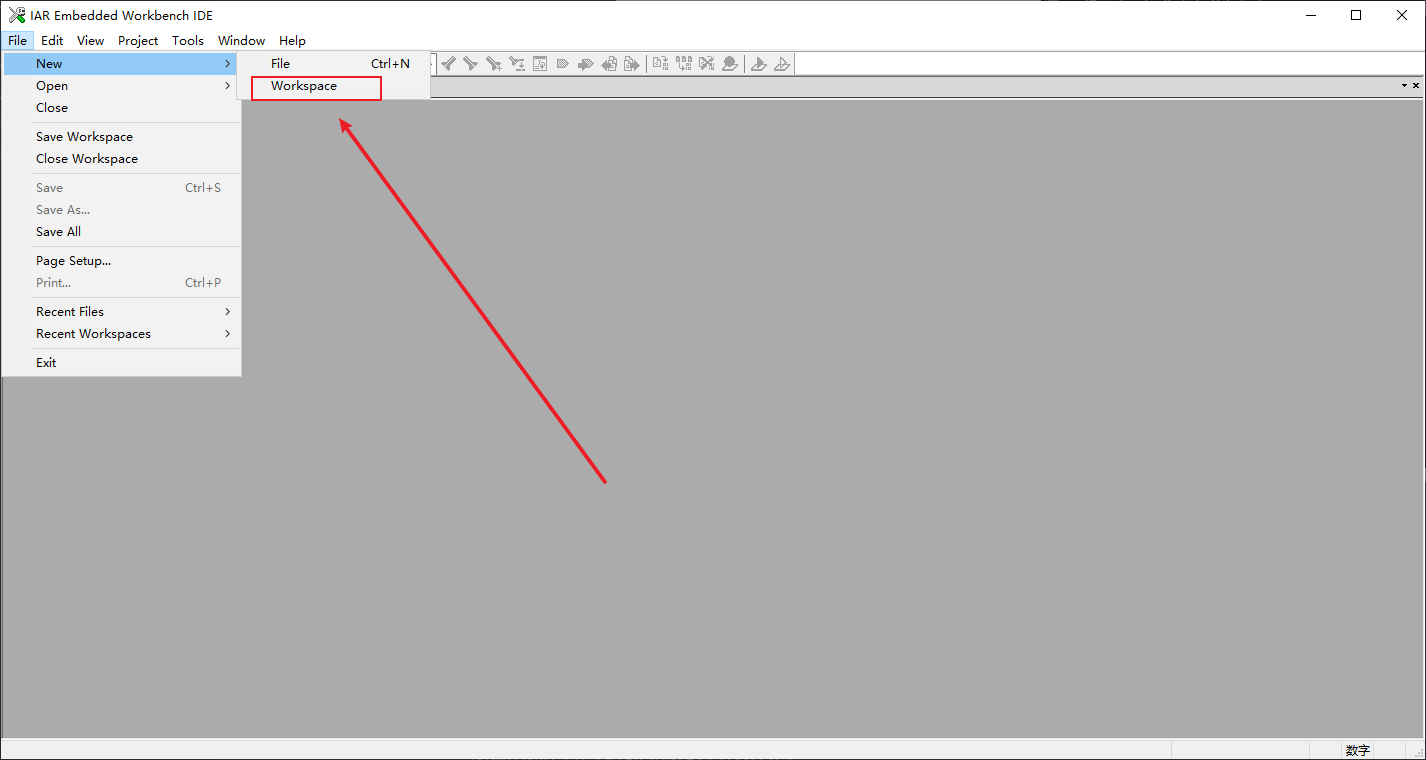
(1)先创建一个工作空间
File-->new-->workspace
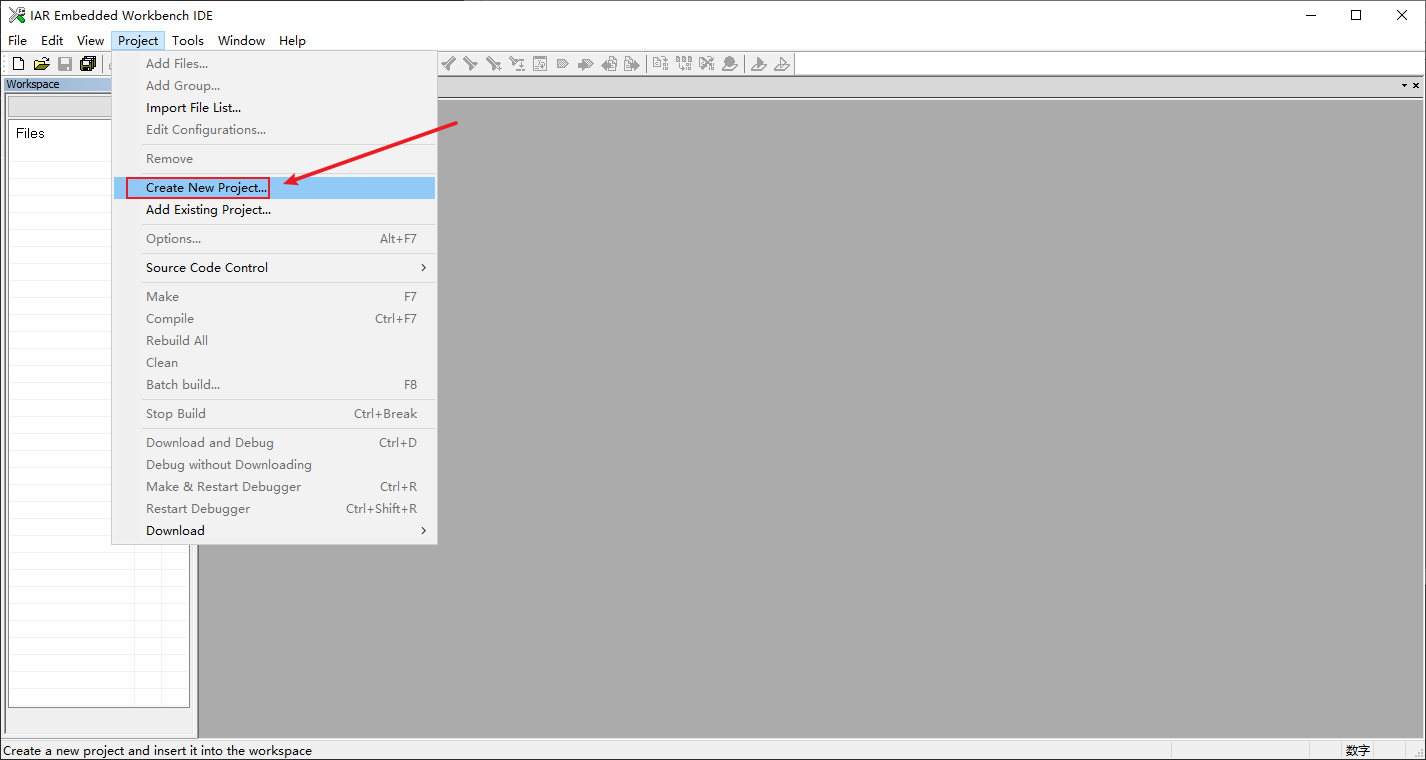
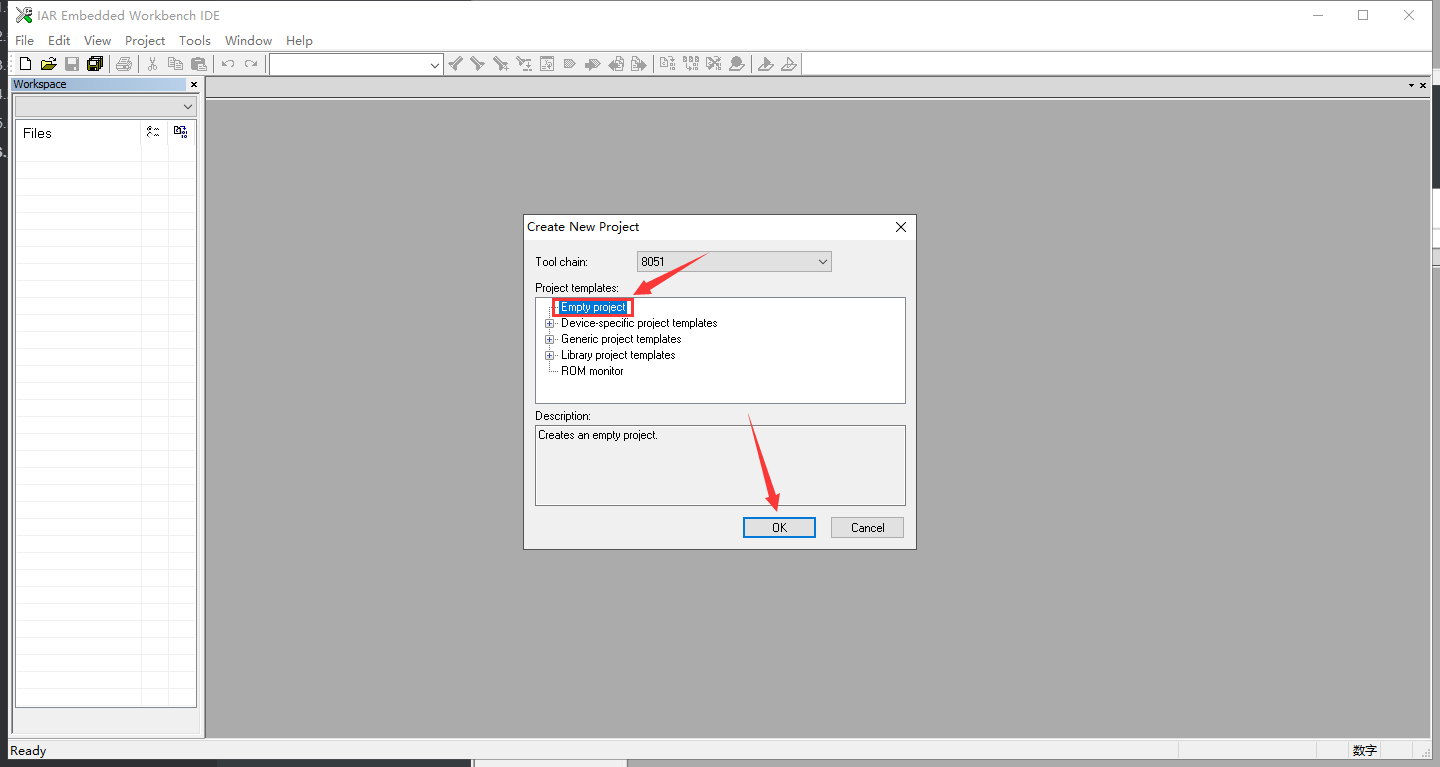
(2)创建一个工程
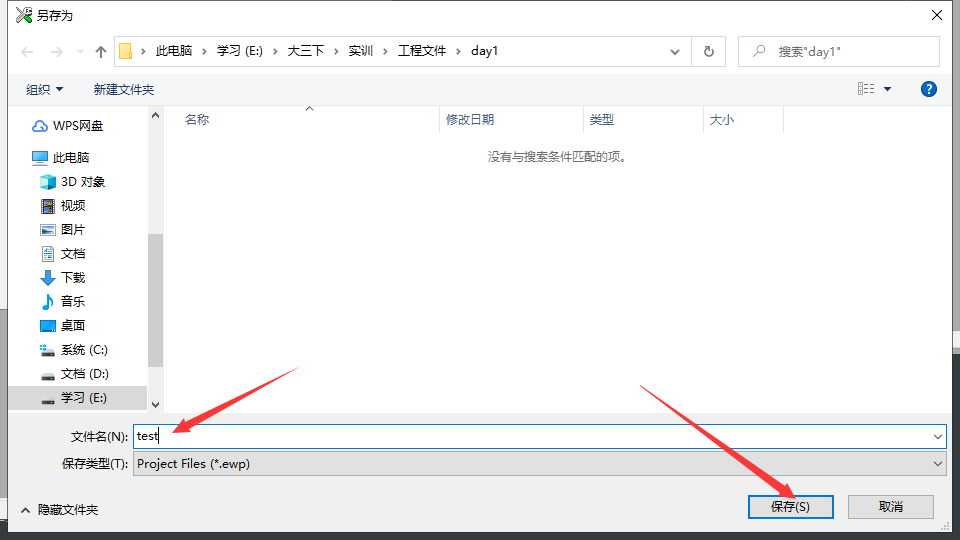
Project-->Create New Project-->Empty project-->0K-->保存到指定目录
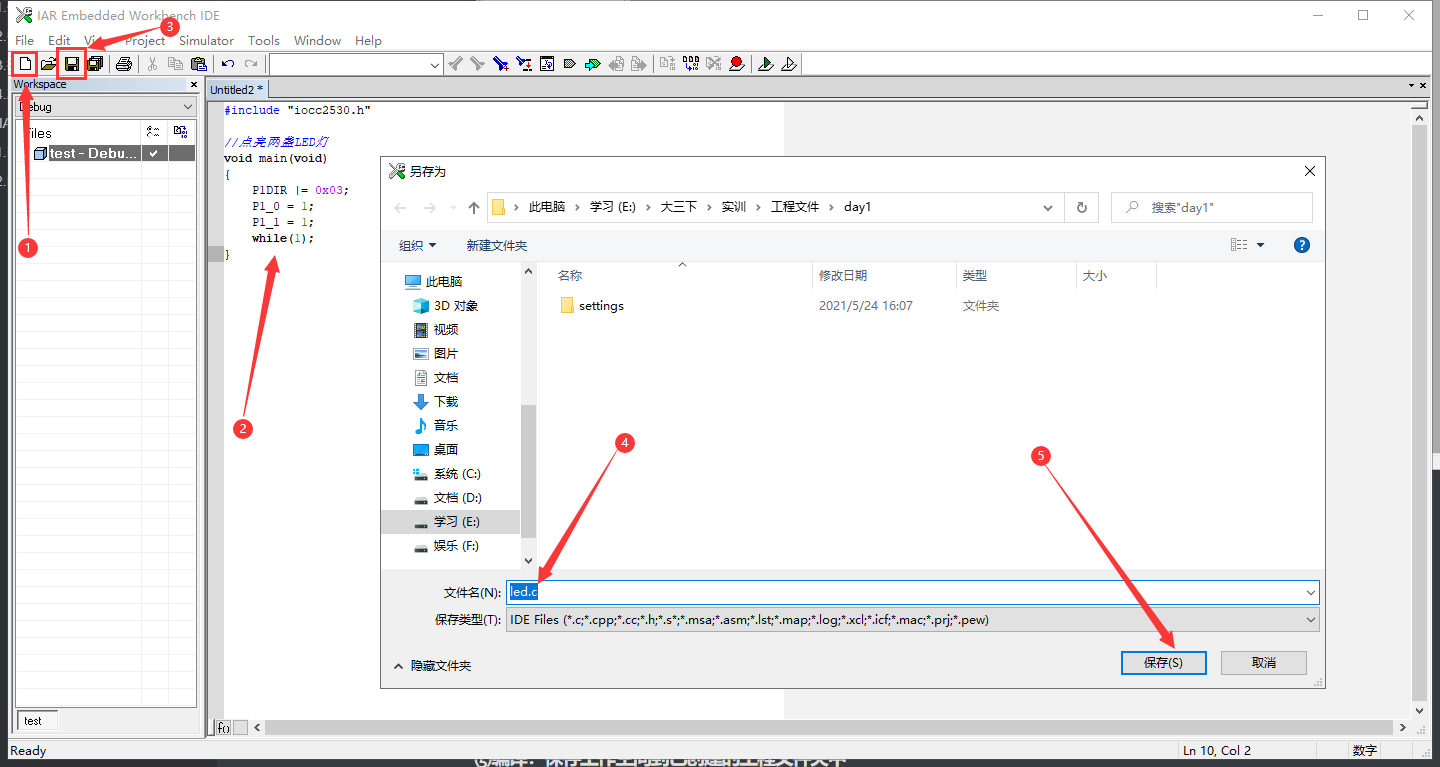
(3)新建一个文件-->保存为.c文件
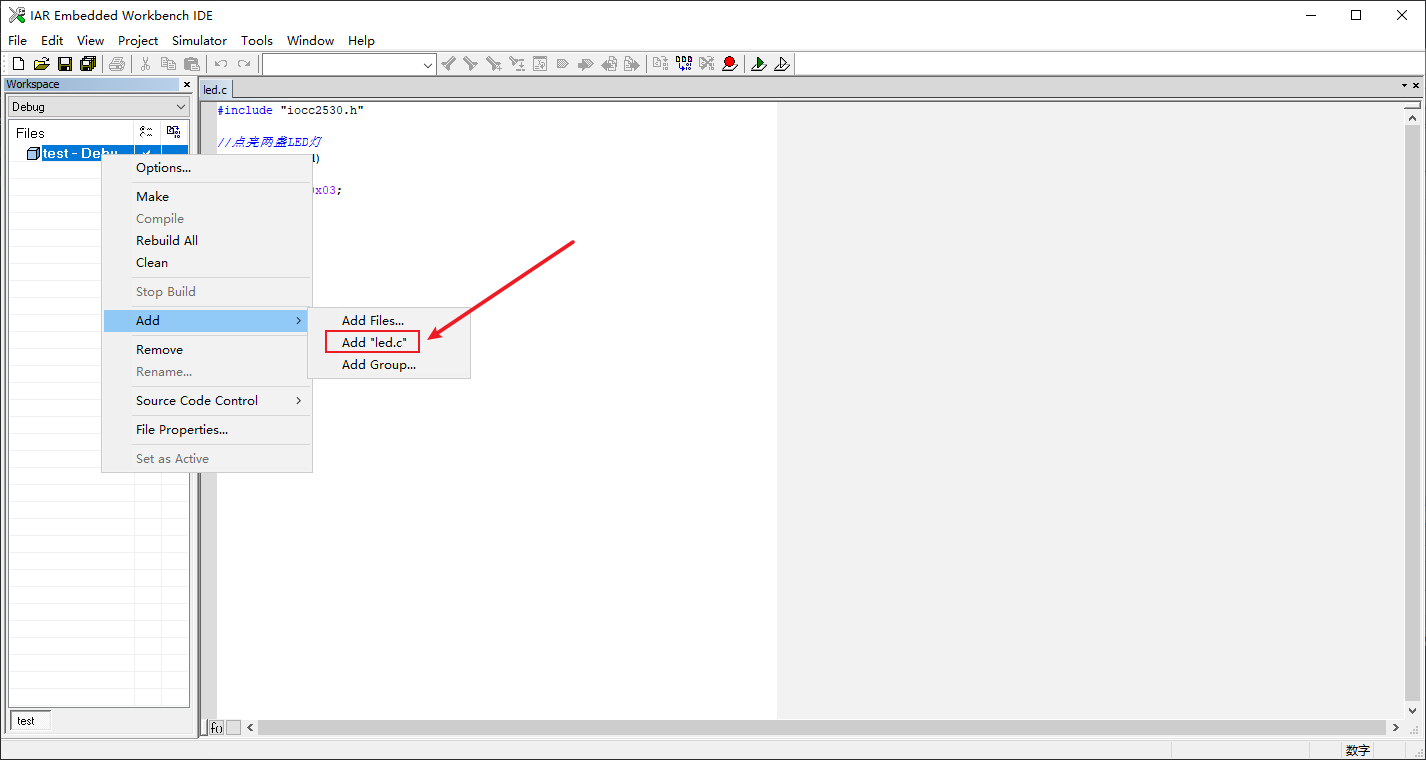
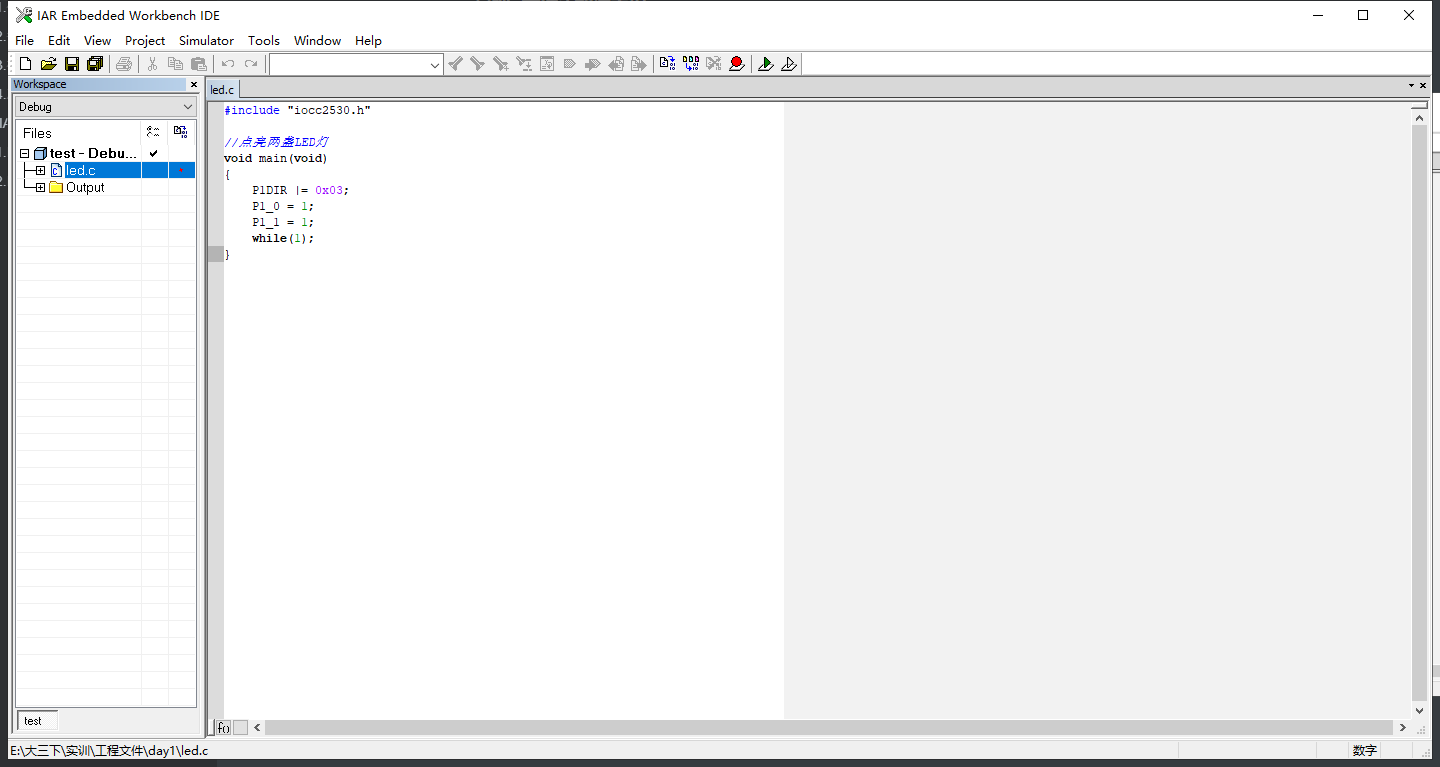
(4)把.c文件添加进工程
右击"工程名-Debug"-->Add
(5)编译:保存工作空间到已创建的工程文件夹中
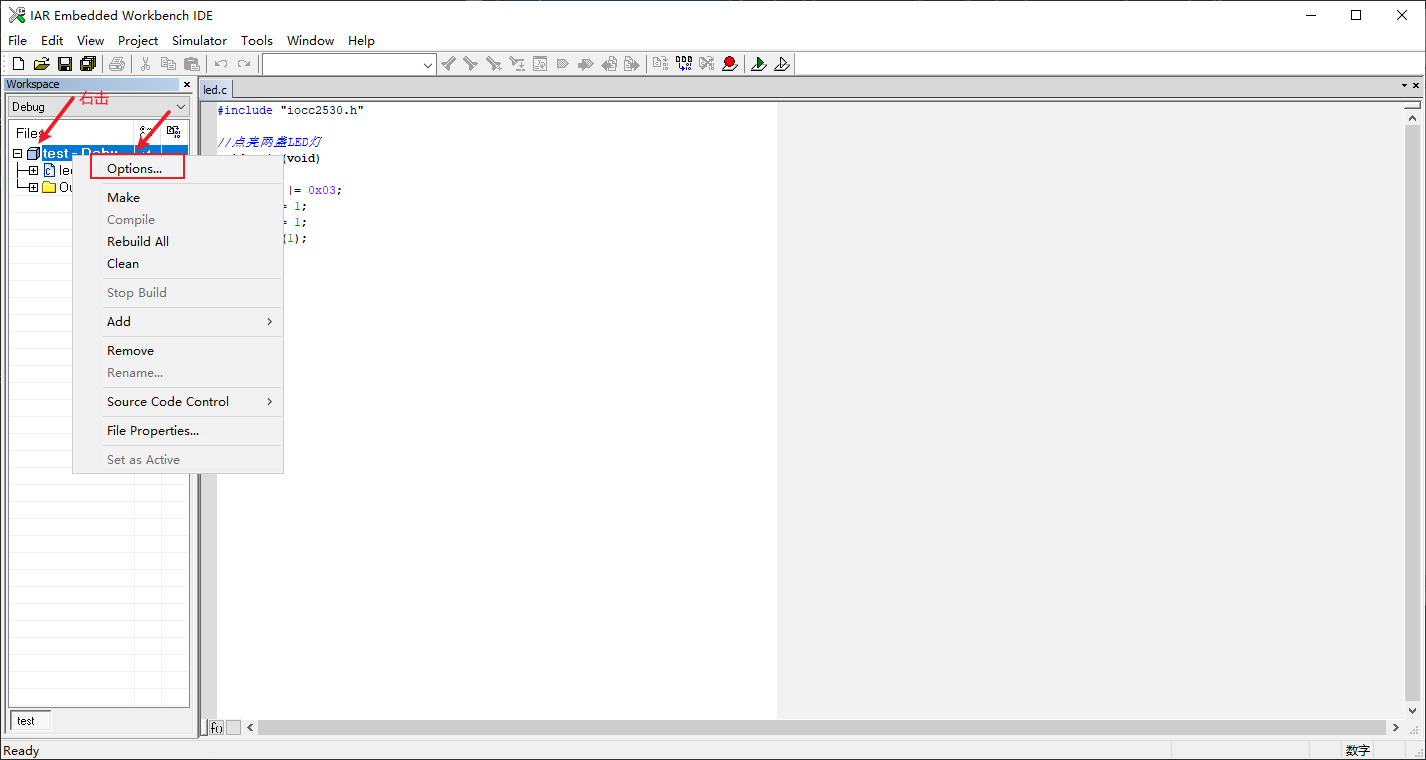
3.选项配置
"工程名-Debug"-->options
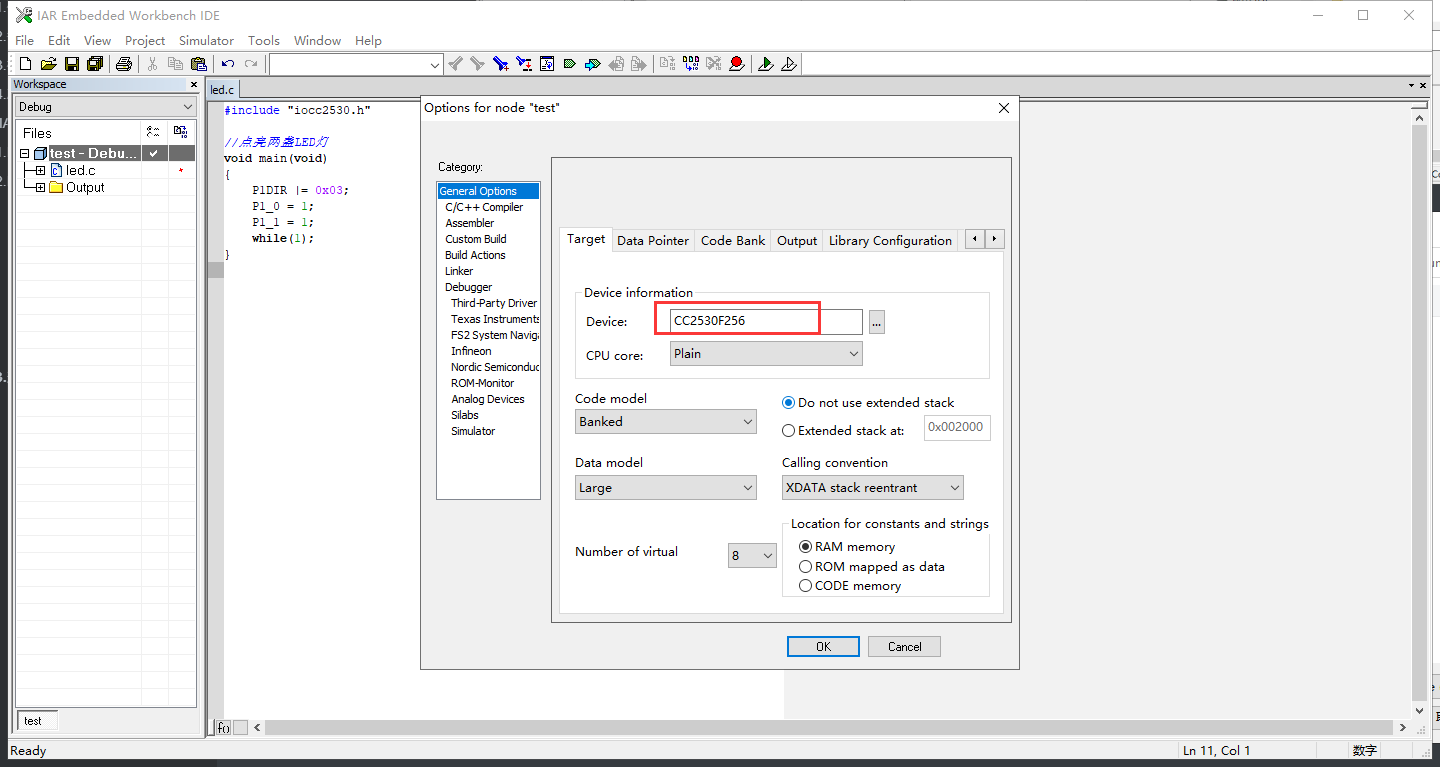
 (1)General Options-->Device
选择Texas Instruments cc2530F256
(1)General Options-->Device
选择Texas Instruments cc2530F256 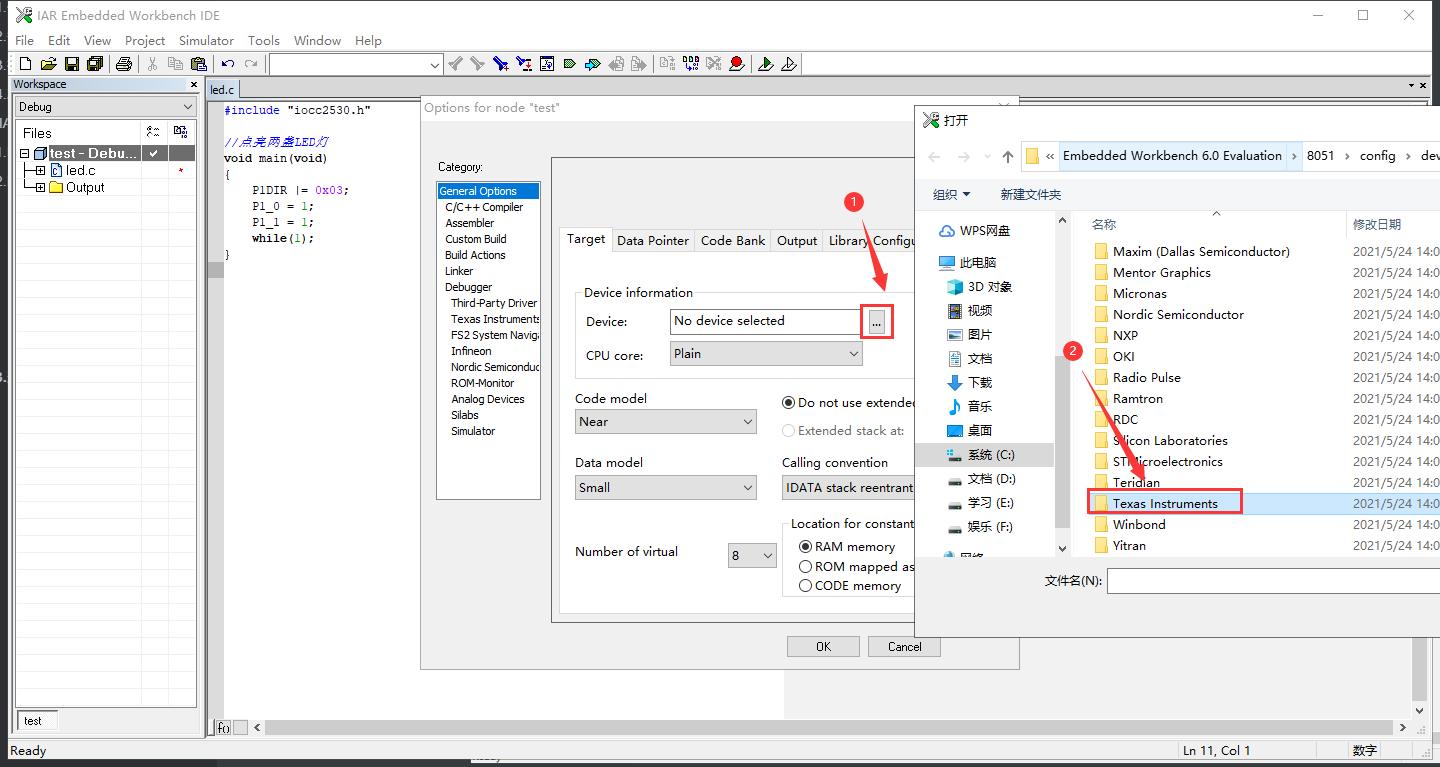

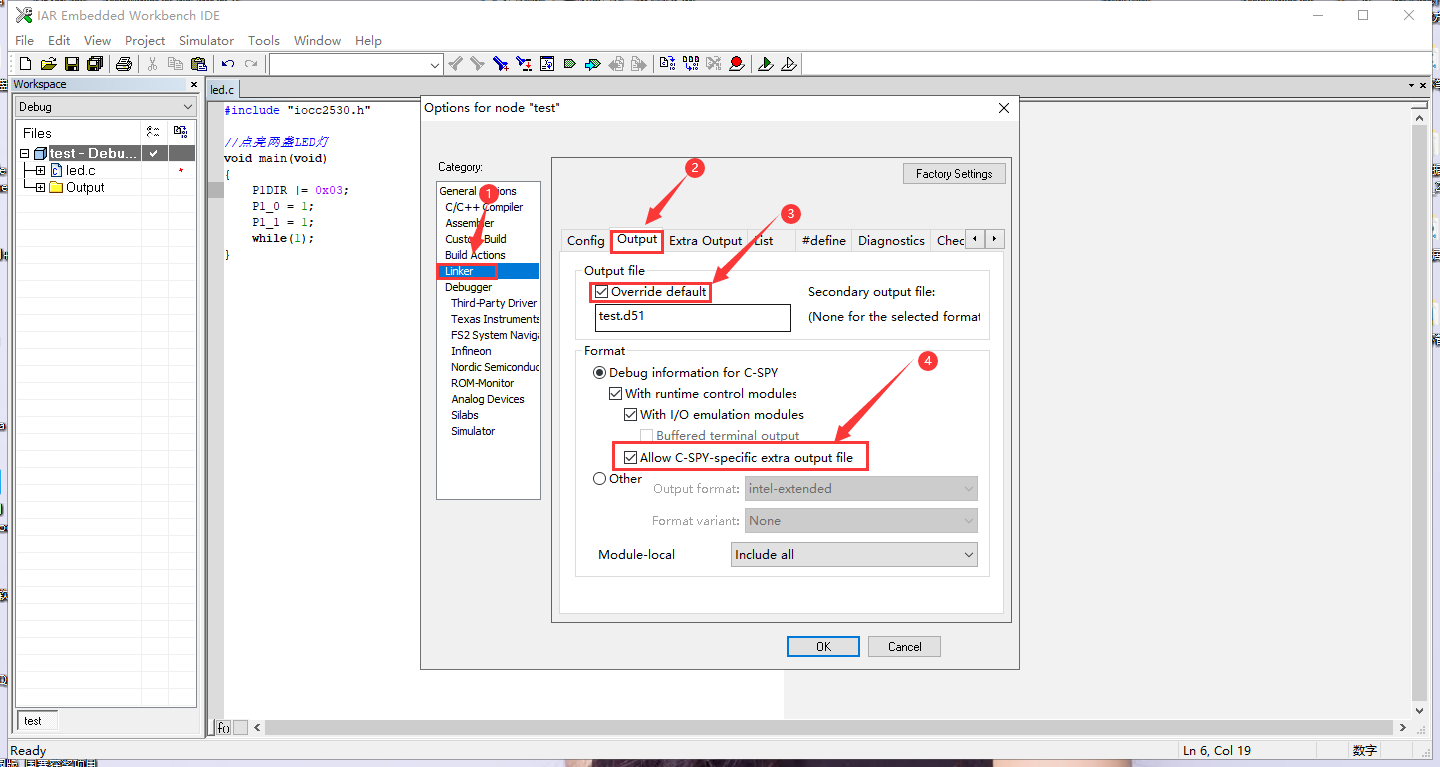
(2)Linker-->Output-->Override default勾上,Allow C-SPY-specific extra output file 勾上
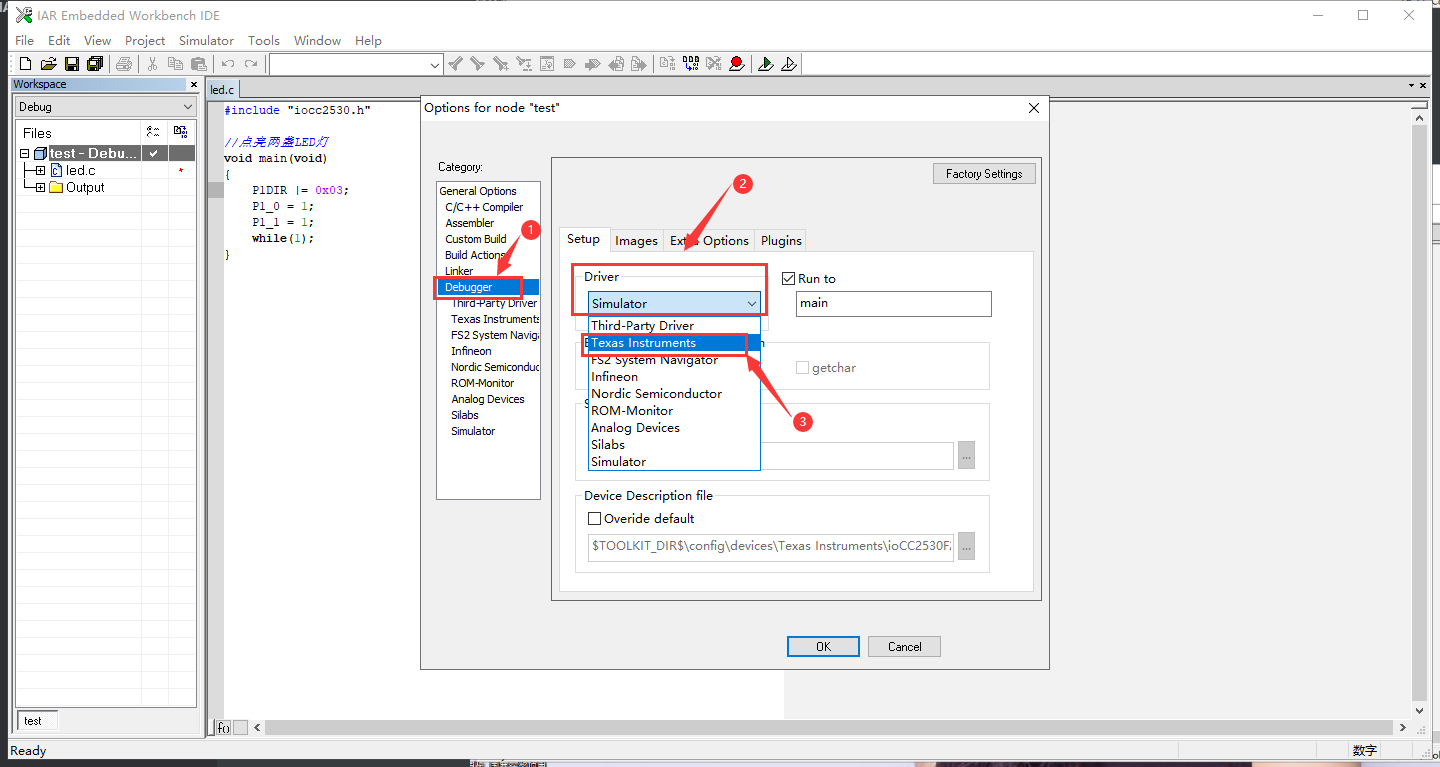
 (3)Debugger-->Driver-->选择Texas
Instrments
(3)Debugger-->Driver-->选择Texas
Instrments
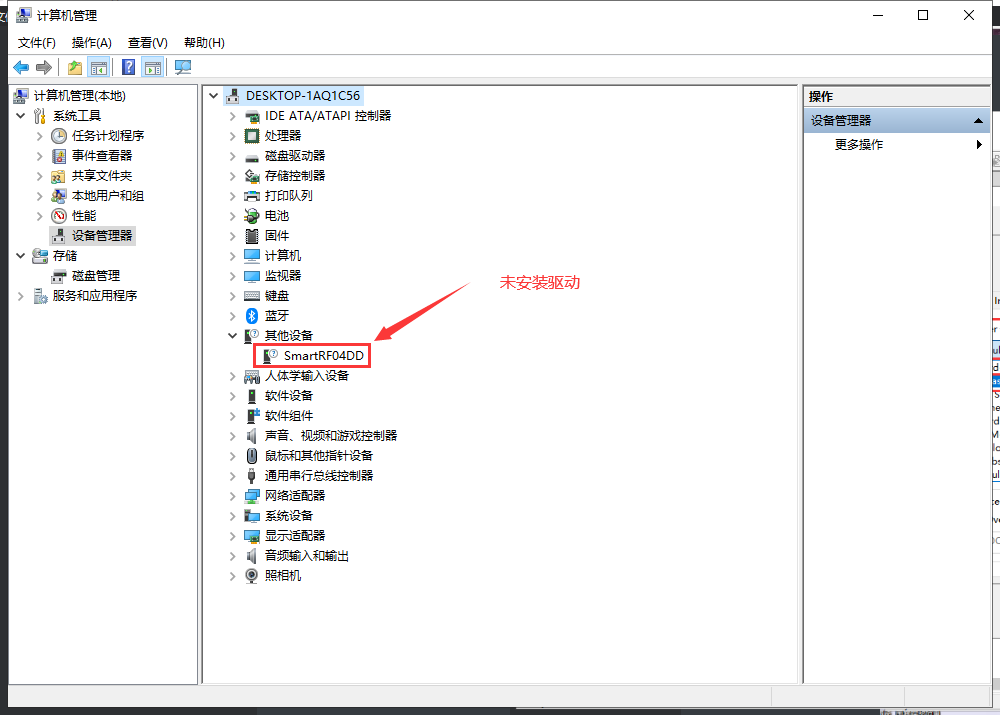
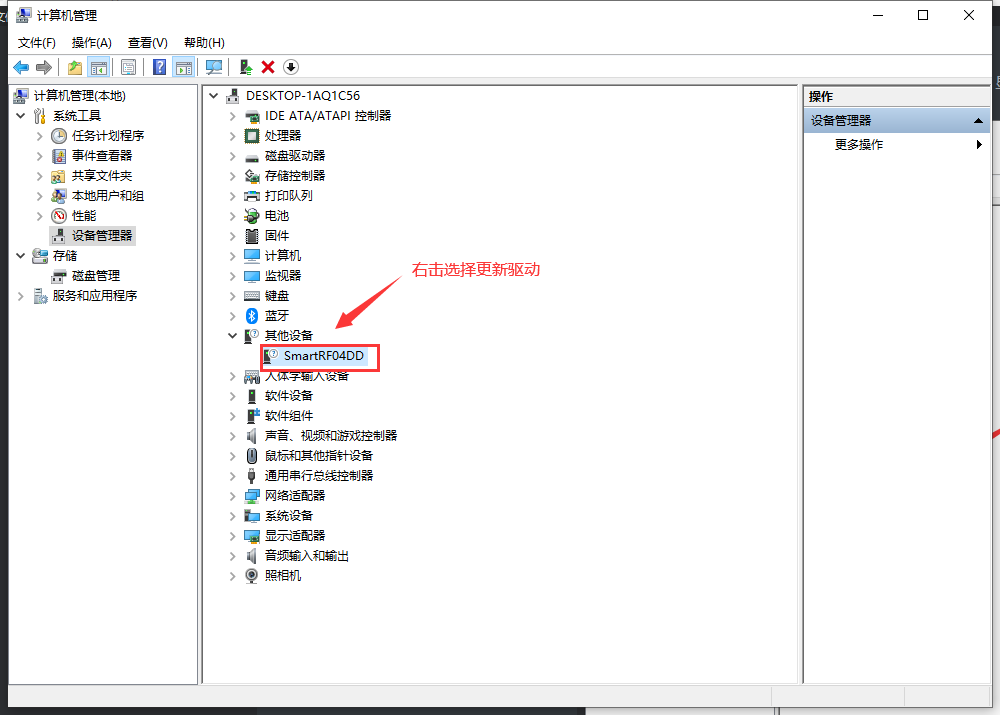
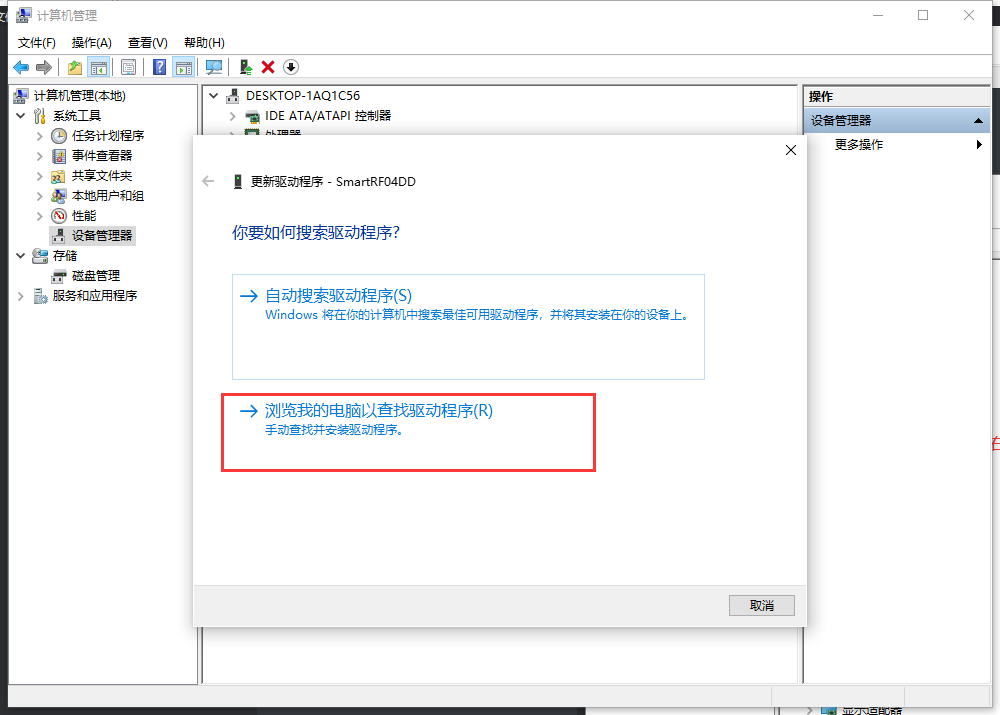
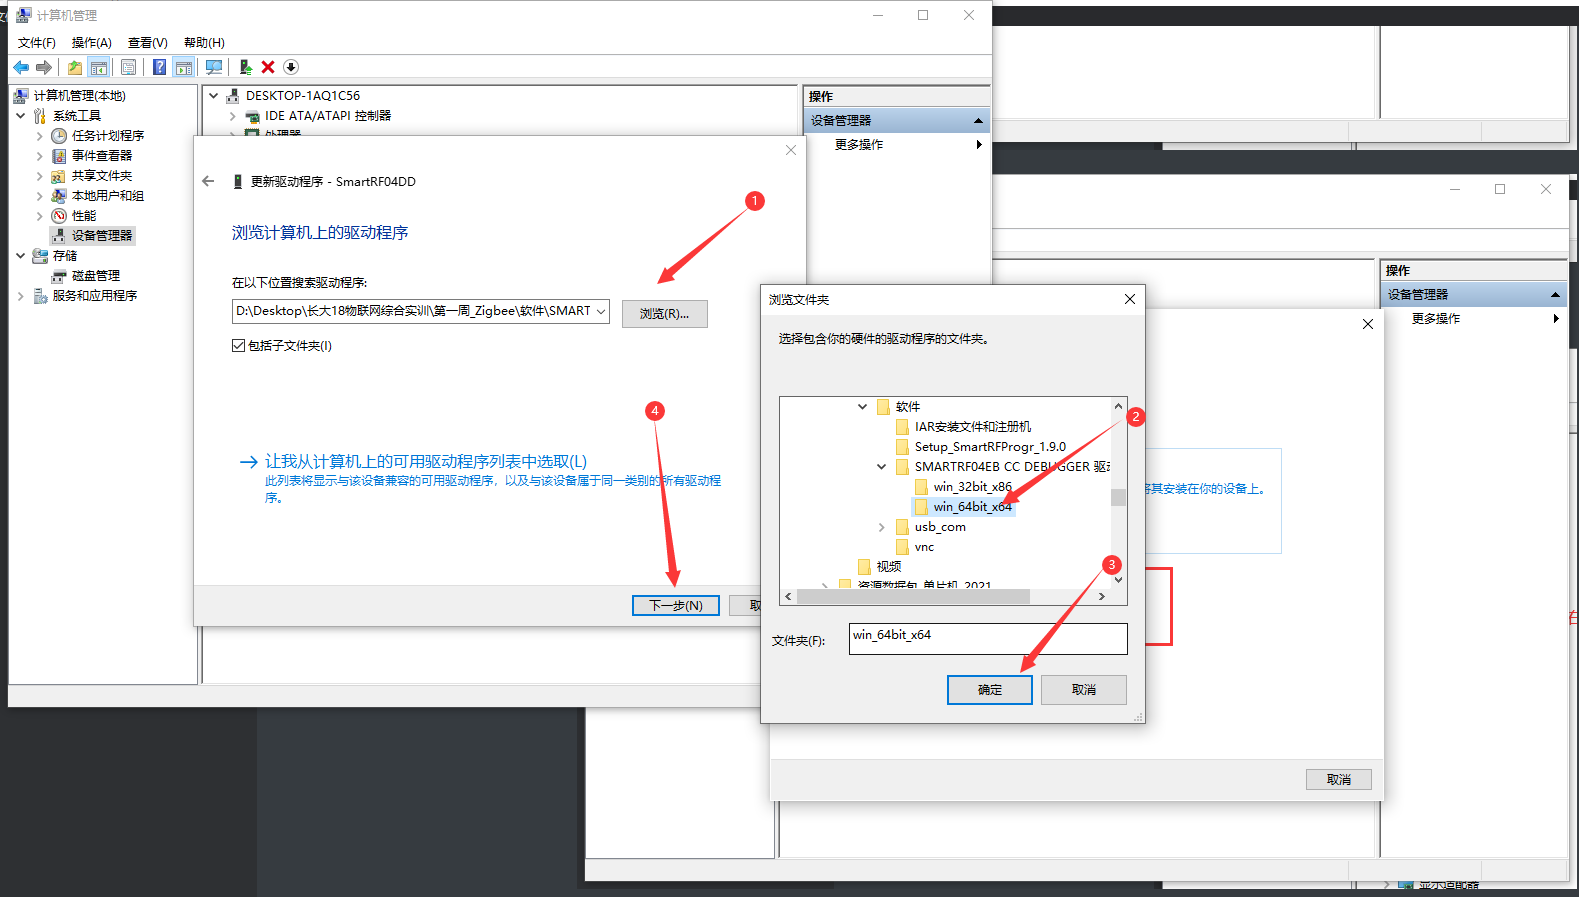
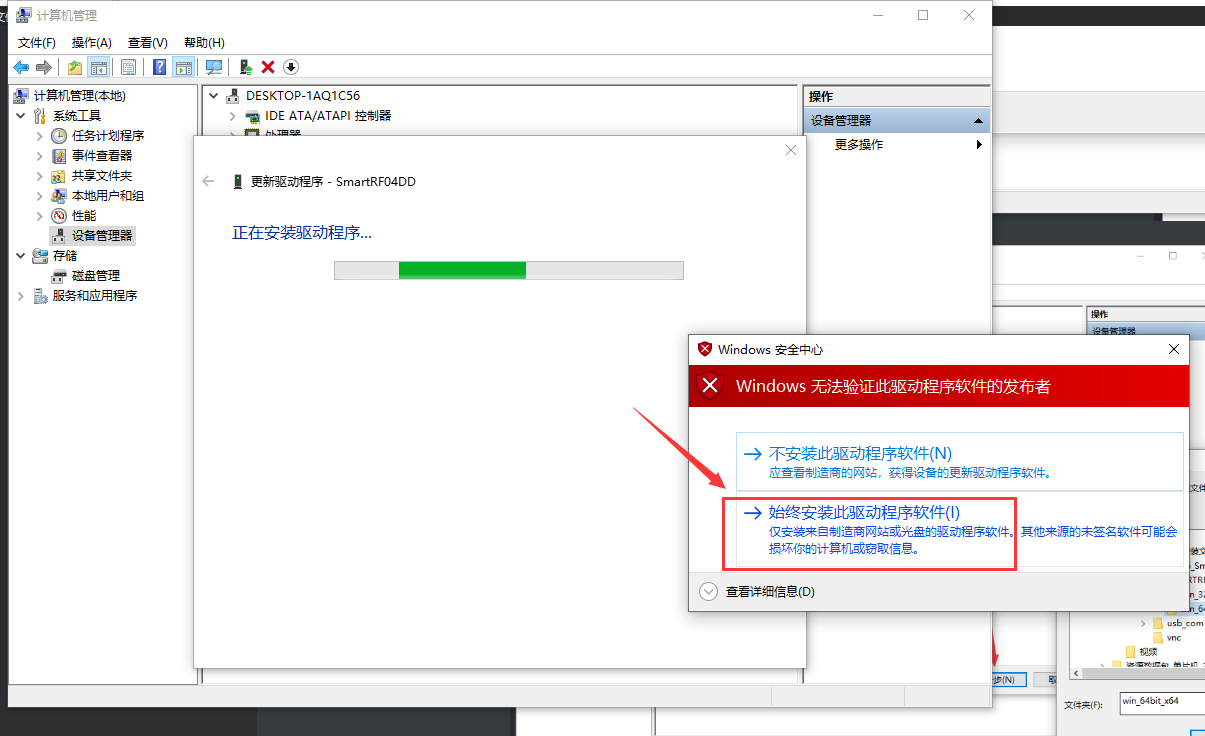
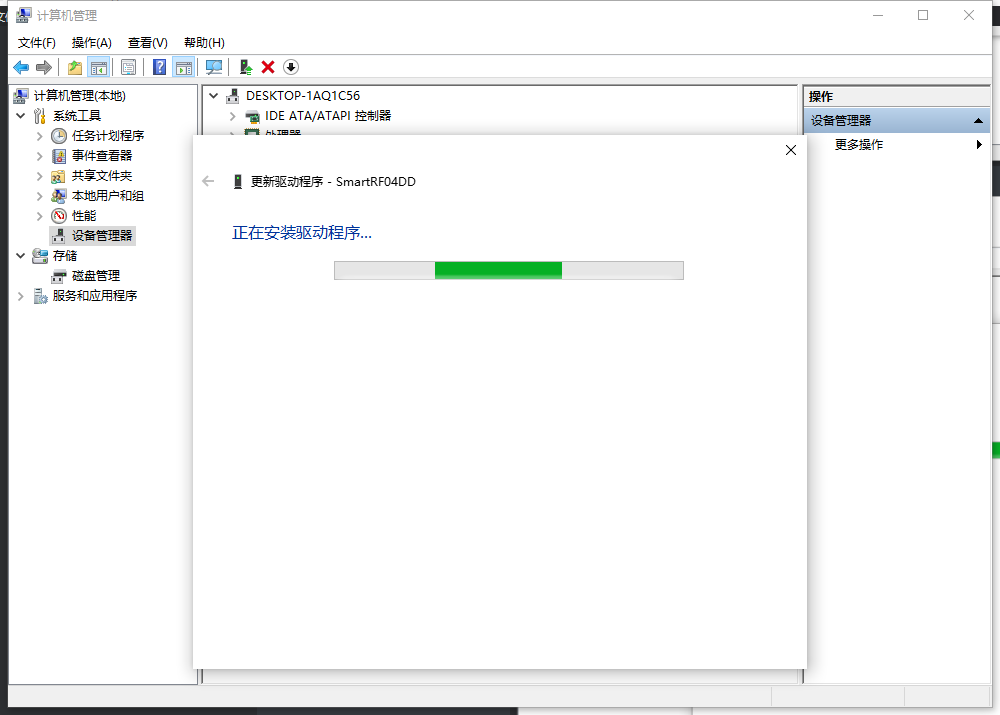
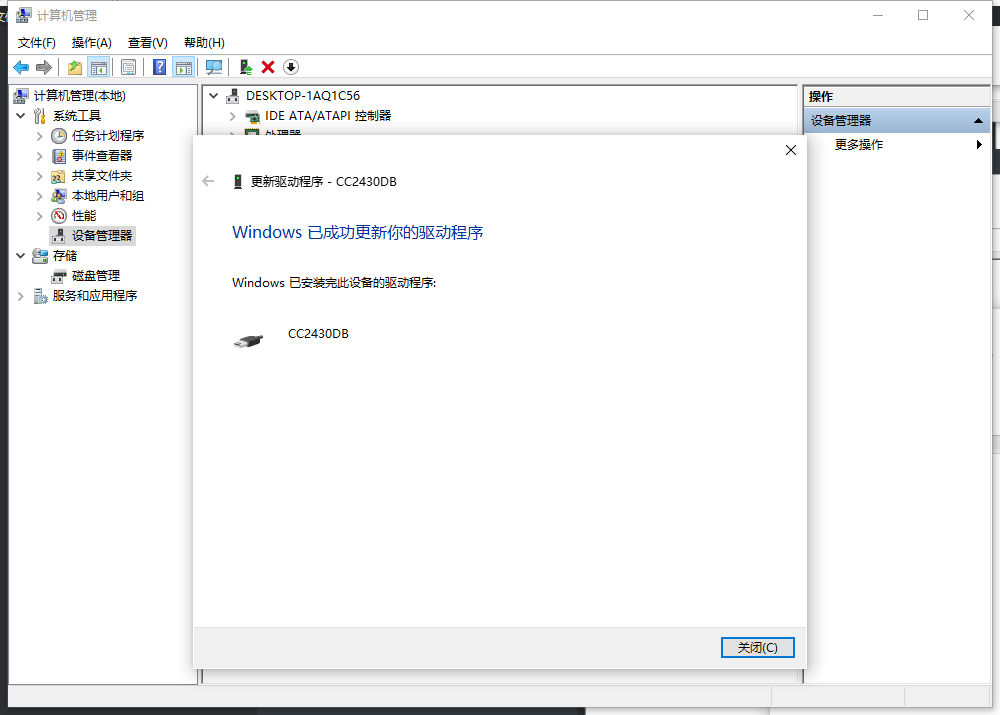
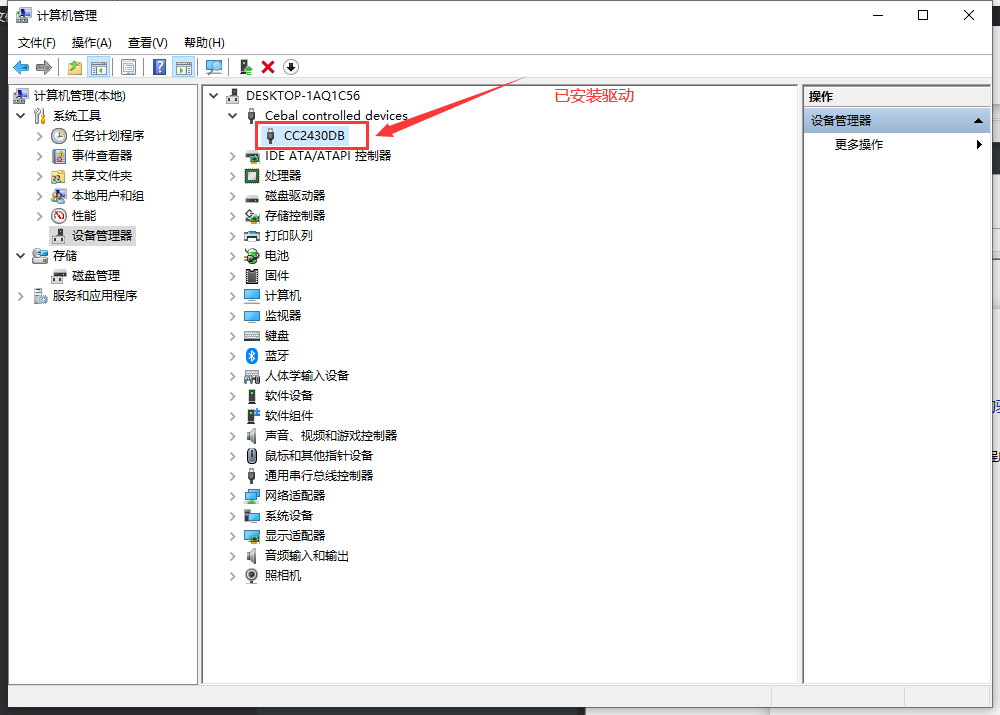
三、驱动安装
在设备管理器里,未安装驱动显示的是SmartRF04EB,装好驱动后,显示的则是CC2430DB
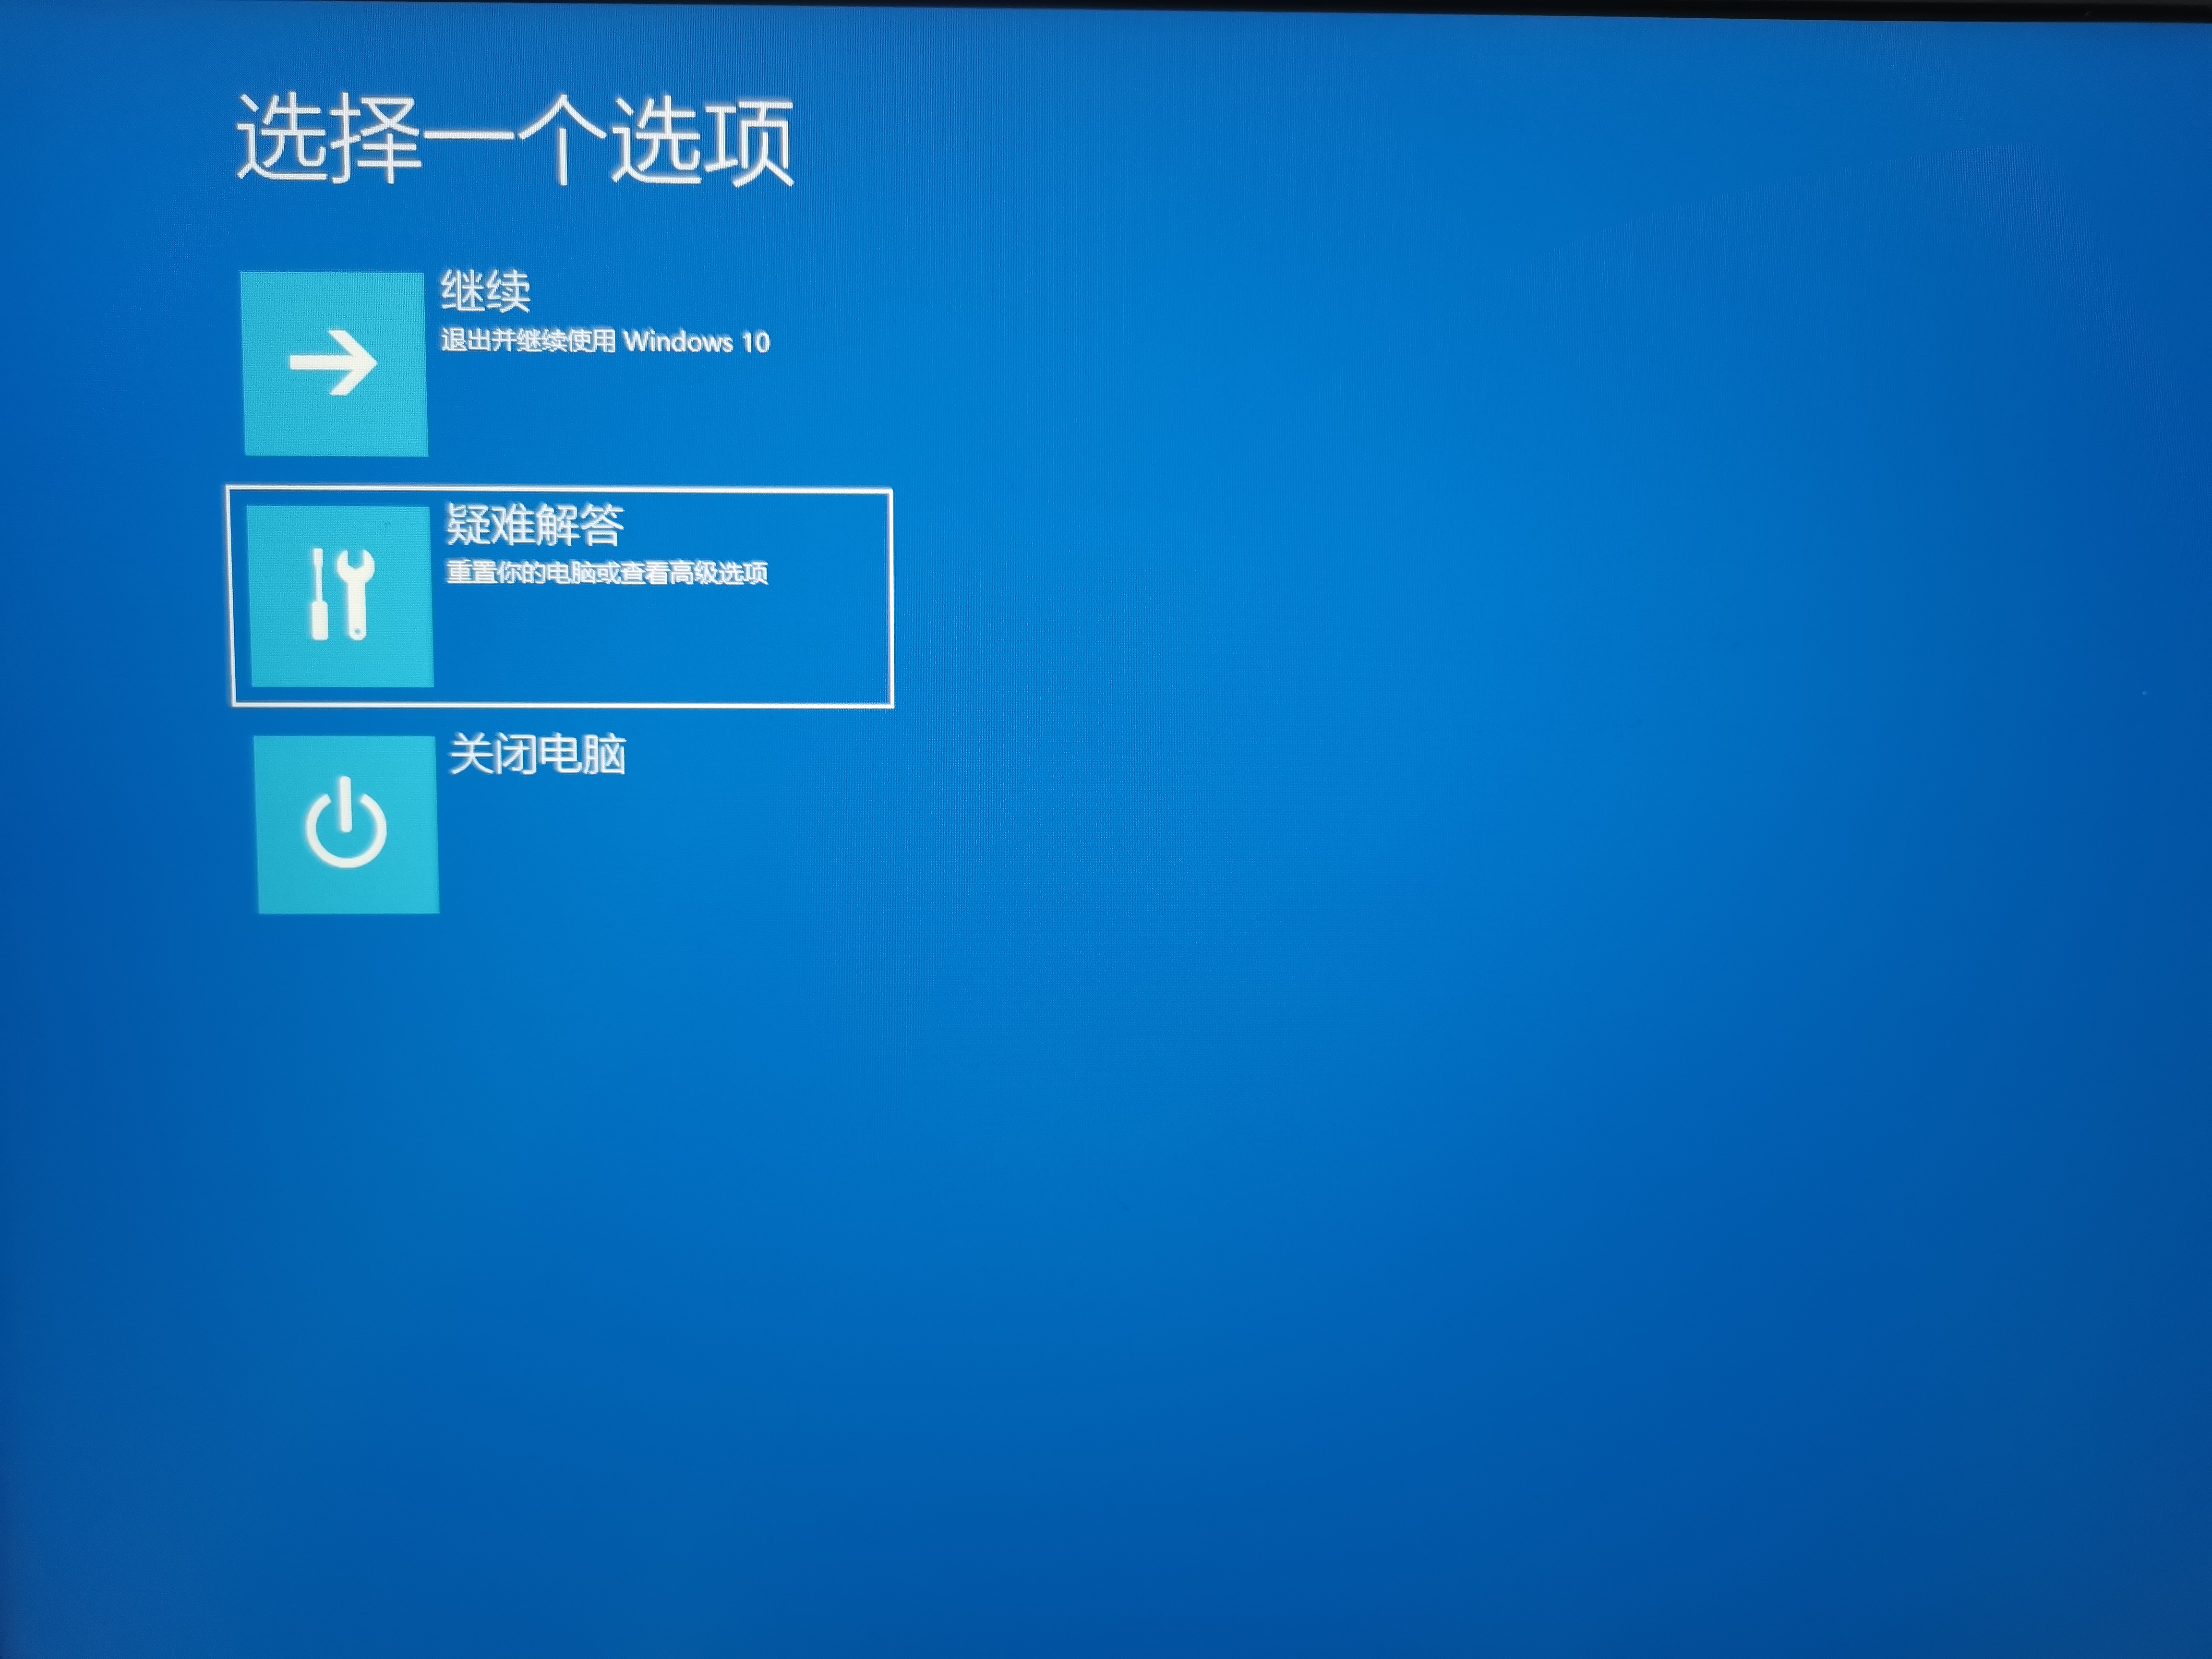
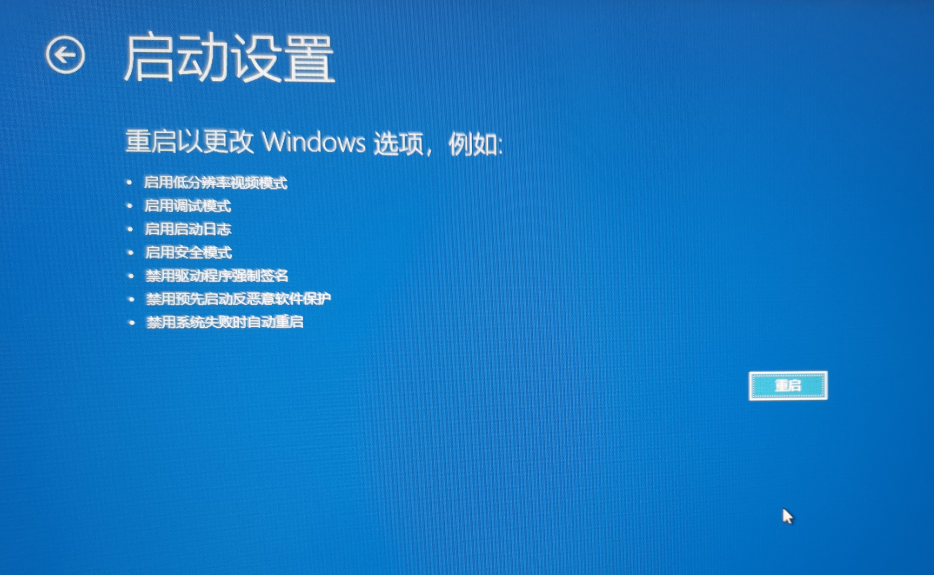
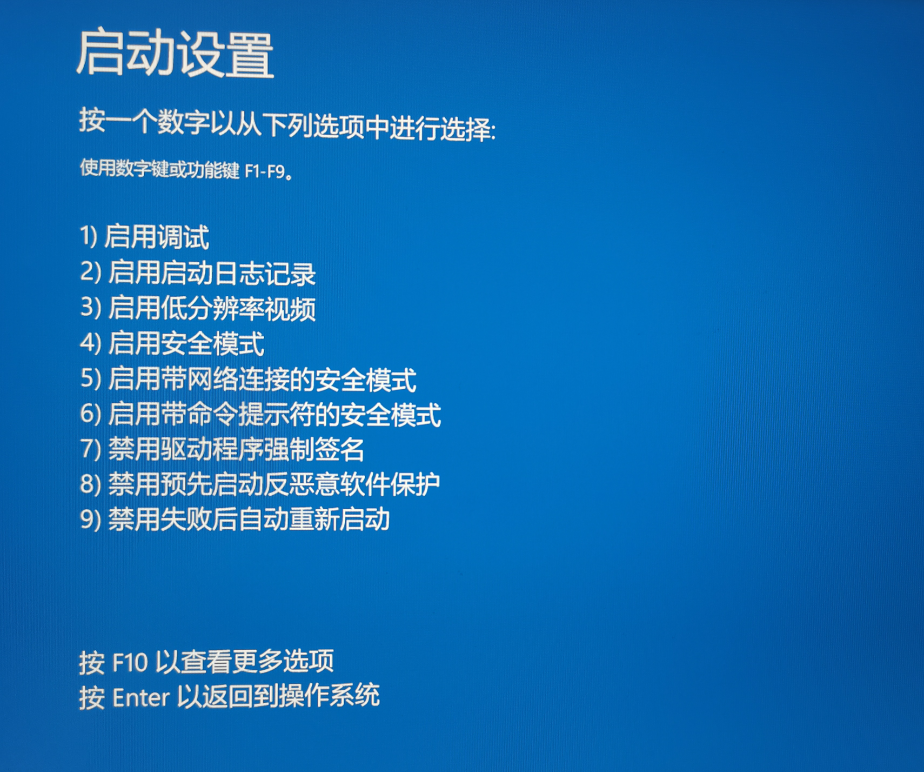
哈希值错误解决办法 1.Windows键+ R,输入shutdown.exe /r /o /f /t 00 ,系统会重新启动一个“选择一个选项” 2从“选择一个选项”屏幕上,选择“疑难解答” ,选择从“疑难解答”屏幕“高级选项” ,选择从“高级选项”屏幕“Windows启动设置” ,点击“重新启动”按钮,系统将重新启动,以“高级启动选项”屏幕 ;重启 3.这会重启之后就跳出来安全模式等列表了 4.选择倒数第三个,禁用强制驱动程序签名,对应哪个数字就按那个数字。 5.重启,按照一般方法驱动就可以成功安装了

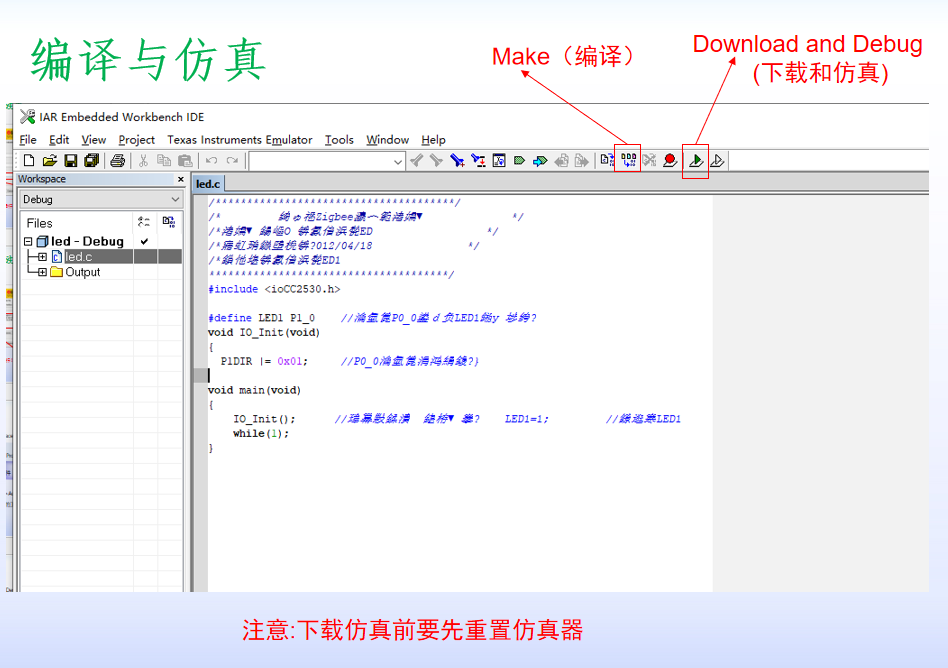
四、编译与仿真
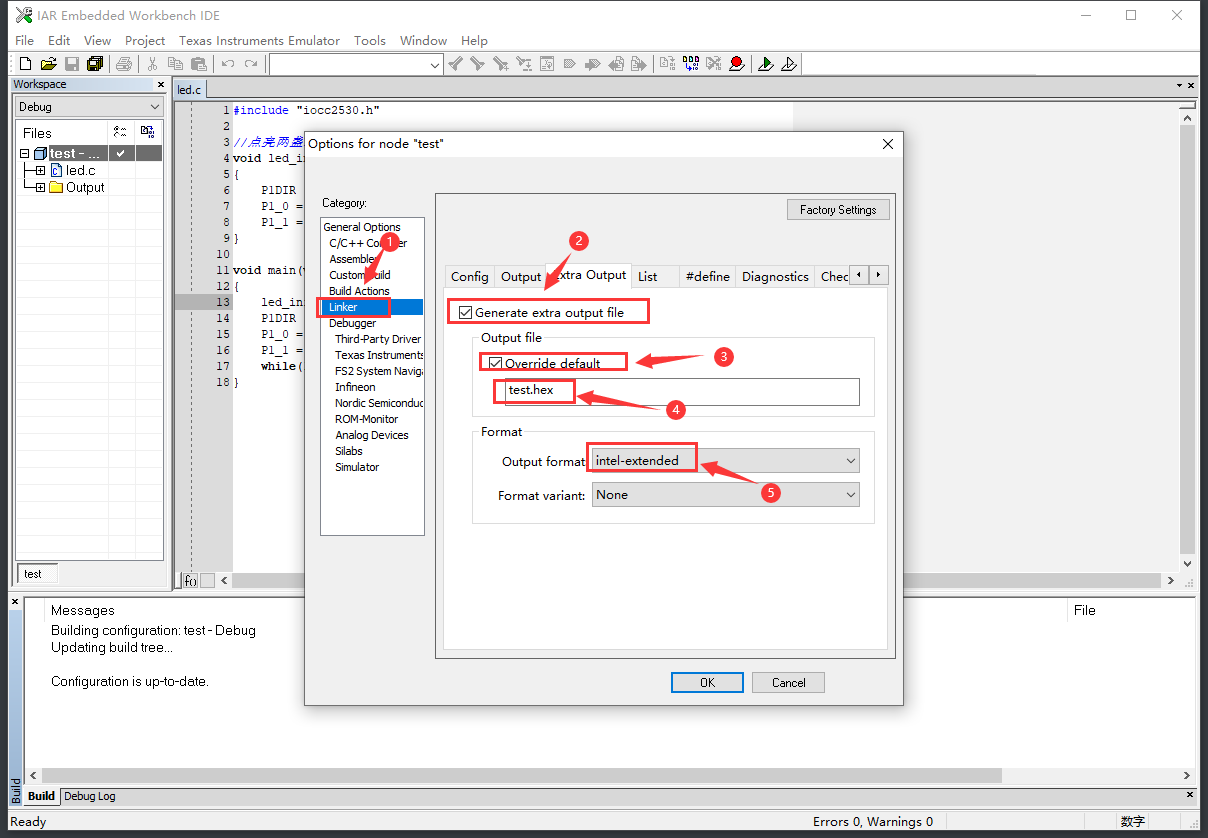
五、生成Hex文件设置
"工程名-Debug"-->options ,Linker-->Extra Output-->Genetare extra outputfile 勾上,Override defualt勾上-->命名为.hex文件,output format :intel-extended-->OK
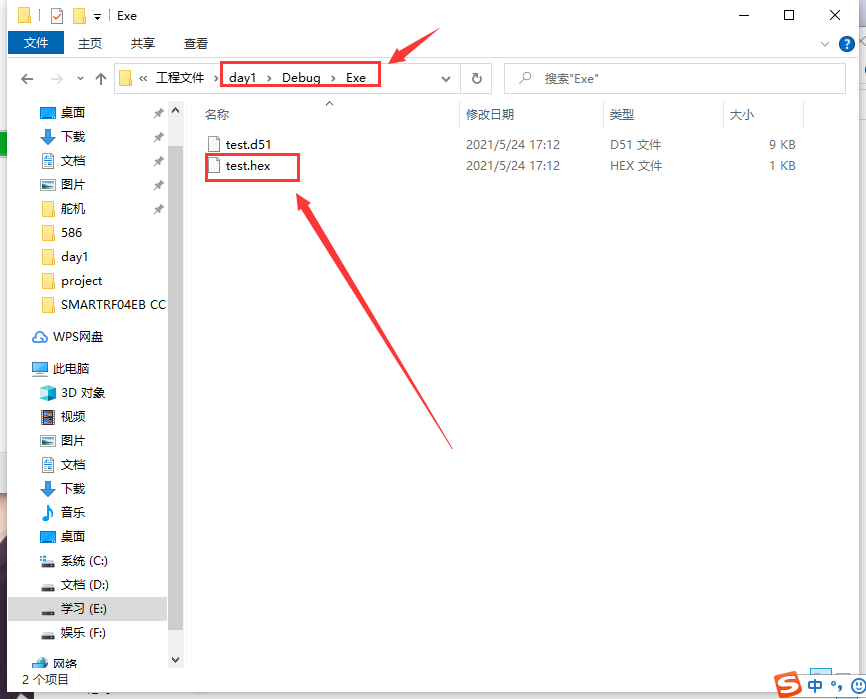
再次编译后就会在 Debug/Exe目录中生成.hex文件
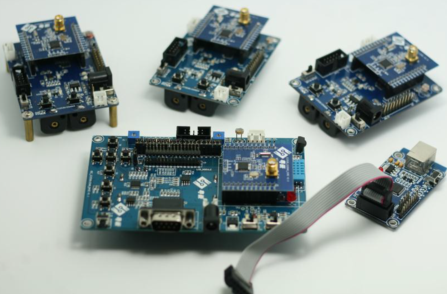
六、ZigBee核心控制器
无线通信采用Ti Zigbee方案。Zigbee节点采用Ti(德州仪器)公司 CC2530,GEC-CC2530有21个数字输入/输出引脚,可以配置为通用数字I/O或外设I/O信号,外设I/O可连接到ADC、定时器或USART等。
其中21个I/O 引脚分成3 个端口(端口0、端口1 和端口2,表示为P0、P1 和P2),其中,P0和P1 每组有8个IO引脚,而P2组仅有5 个引脚实物如图。
七、代码烧录测试
LED闪烁
#include "iocc2530.h"

typedef unsigned char uchar;
typedef unsigned int  uint;

#define LED0 P1_0                //定义P1.0口为LED0控制端
#define LED1 P1_1                //定义P1.0口为LED1控制端

//点亮两盏LED灯
void led_init(void)
{
    P1DIR |= 0x03;
    LED0 = 0;
    LED1 = 0;
}

void delay_ms(uint msec)
{
    uint i,j;

    for (i=0; i<msec; i++)
        for (j=0; j<535; j++);
}
void main(void)
{
    led_init();
    while(1)
    {
        LED1 = 0;
        LED0 = 0;
        delay_ms(500);

        LED1 = 1;
        LED0 = 1;
        delay_ms(500);
    }
}

